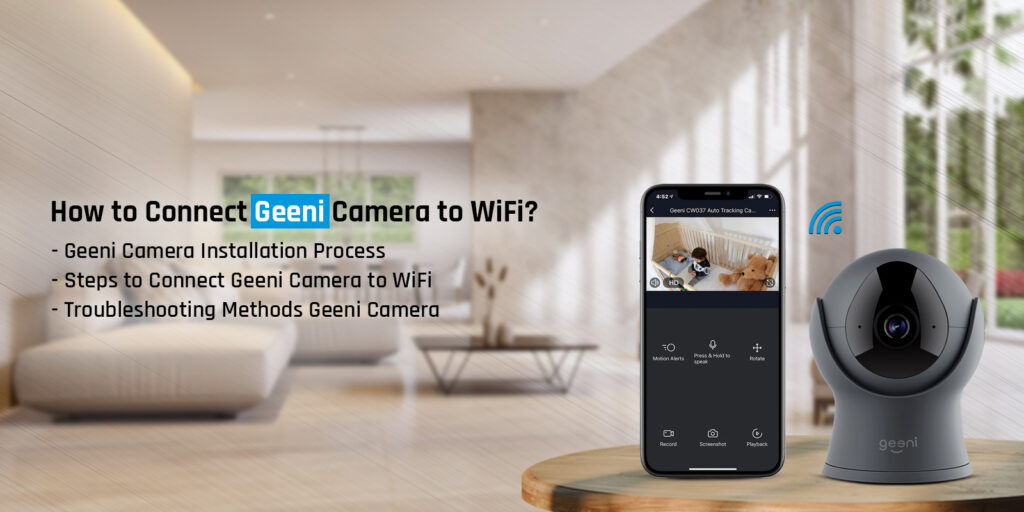
The Geeni camera is among the best security cameras of all time. It’s effortless to set up, as anyone can do it without professional help. It has impressive picture quality along with various other features. To get the best out of your camera, you must set it up accurately and connect Geeni camera to WiFi. Before setting it up, you need to install it at the perfect spot.
If you require some assistance with installing the Geeni camera correctly, we’ve got you! We have designed this post to help users with setting up the camera along with the procedure to connect Geeni camera to new WiFi. Keep reading ahead to find out.
Installation Process for the Geeni Camera
Before you proceed with the Geeni camera connect to WiFi, you need to install it correctly. Ensure to pick the most suitable spot for your Geeni camera.
Pick a location where you’ll receive the perfect view of the setting you want to watch over. Below are the steps to install the Geeni camera:
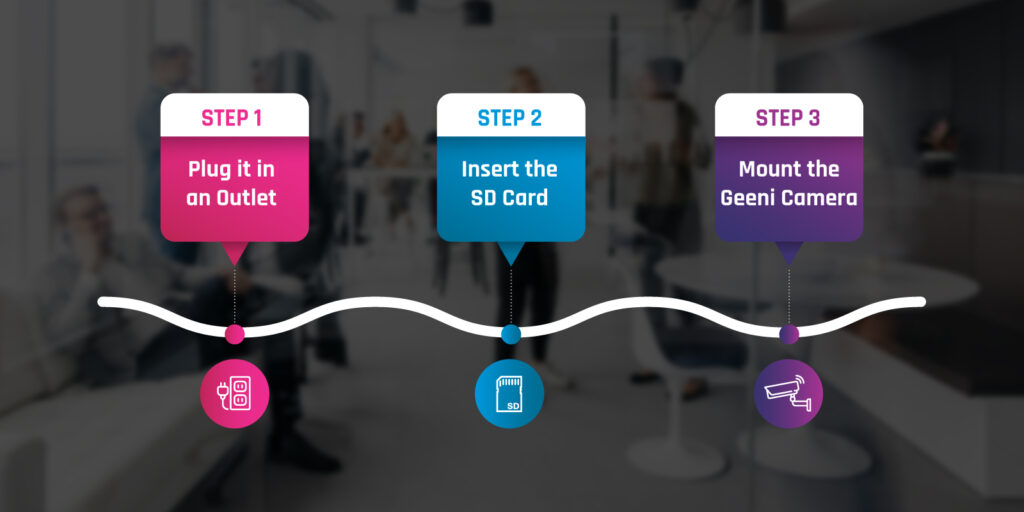
- Plug it in an Outlet: You can begin by plugging the camera into a stable power outlet using a USB cable. The LED light will light up solid blue while initiating. After plugging the camera into a power outlet, the LED will blink blue.
- Insert the SD Card: When the router has a stable power source, you can insert the SD card. You just need to lean the lens up. You can proceed with this manually or via the app to access the slot. Now, insert the SD card into place properly.
- Mount the Geeni Camera: Now, you need to fix the camera on the spot you chose. You can use the screws and the wall anchors to attach the camera. Fix the anchors into place accurately and then turn the base of the camera on the plate.
These are the installation steps for the camera. Further, we’ll discuss the procedure to connect Geeni camera to WiFi.
Steps for the Geeni Camera Connect to WiFi
Now that the camera installation is successful, we can proceed with the Geeni camera setup. You can easily set up the Geeni camera using App. The steps are as follows:
- Firstly, download and Install Geeni App on your device.
- Secondly, install the Geeni app, you need to create your account by giving the details.
- Thirdly, you can log into the app.
- Hereon, to add the camera, you can use the ‘Easy Mode’ method.
- In this method, you just need to click on ‘+’ at the top of the screen and select ‘Wi-Fi Camera’.
- Add camera by scanning QR code on the camera as well.
- The LED light on the camera will blink blue, indicating the camera is ready for setup.
- After that, you need to enter the name and password of the WiFi network.
- Now, the app will attempt to form a connection to WiFi network. This will take some time.
- When the LED light is blue, indicates the connection is successful.
The Geeni camera connects to WiFi process is successful. Now, you have access to the router’s settings and every feature. You can watch the live stream from the app whenever you want now. The camera offers various features such as motion alerts, one-way audio mode, a camera rotation option, recording, screenshots, and various others.
How to Connect Geeni Camera to New WiFi?
When you are adding a new networking device to your house or moving to a new place, you will have to set up your Geeni camera again. To do this, you will have to reset the camera to set it up again. The reset procedure is as follows:
- Firstly, locate the reset hole on the camera next to the SD slot.
- Secondly, using the reset pin, push the button.
- Thirdly, when the LED light starts blinking, the camera has reset.
- Now, you can connect Geeni camera to new WiFi.
This is the procedure to reset the Geeni camera. Just remember, the reset will restore the factory default settings of the camera. After the reset, you will have to reconfigure the camera. You can reset the camera when you are facing issues with it as well. The reset will eliminate any glitches and bugs with your Geeni camera.
Troubleshooting Method the Geeni Camera
It’s essential to connect Geeni camera to WiFi, as it requires a stable and constant WiFi connection. Without a WiFi network, the camera will not work. If you are facing issues with your camera, you can fix the issues easily. The troubleshooting methods are as follows:
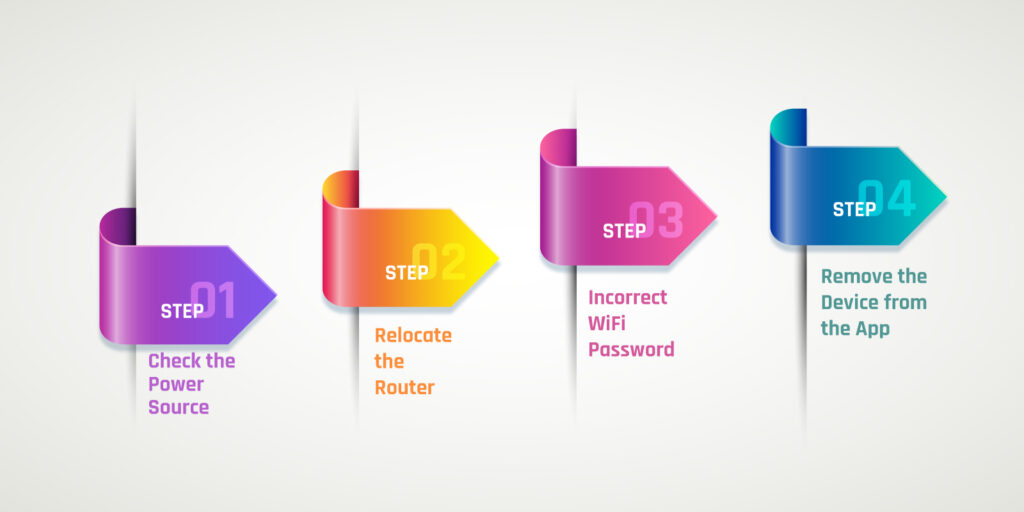
- Check the Power Source : The Geeni camera requires a steady source of power as well. You need to plug the camera into a stable outlet 24/7. If the camera’s not on, check the outlet. You can try plugging it into a different outlet and check again if it’s working this time or not. Ensure there are no damages on the power cable. If there are, consider replacing it.
- Relocate the Router : You need to place the camera where it will receive a good network connection. If the camera is too far from the router, it will have trouble connecting to it. You can relocate the router, where the camera will be inside its range to ensure a seamless connection.
- Incorrect WiFi Password : While setting up the camera, ensure to enter the correct password of the network. If you enter the wrong password, it will not connect to the WiFi network. Another possibility could be, you recently changed the WiFi password. If this is the case, you need to connect the camera to the WiFi using the new password.
- Remove the Device from the App: You can try removing the device from the app. Sometimes, there’s a glitch with the app. After removing the device from the app, and then add it again and reconfigure it. This should fix the issue with the device.
Some More Methods :
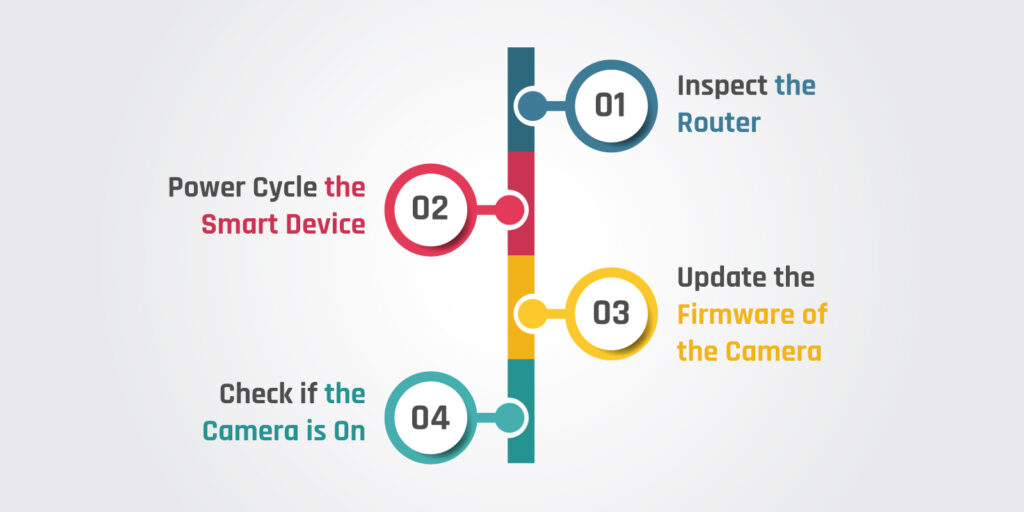
- Inspect the Router: There could be an issue with your router as well. If the router’s not working efficiently, you will need to troubleshoot it. You can try power cycling it, updating the firmware, and when nothing works, you will have to reset it. Just remember, the reset will restore the factory default settings of the router, which means you will have to reconfigure it.
- Power Cycle the Smart Device: Power cycling the camera will eliminate any small bugs and glitches with the smart home camera. All you need to do is power off the device, unplug and leave it like that for some time. After a few minutes, you can power it on and plug it in again. Now, the device should be working fine.
- Update the Firmware of the Camera: You can try updating the firmware of the camera to eliminate any glitches. The update can be done via the app. In the app, you just need to go to ‘Devices List’ and choose the device you want to upgrade. After that, from the ‘Advanced Settings’, you can check for the latest firmware versions. If a version is available, you can click on ‘Update’ to upgrade the firmware to the latest version.
- Check if the Camera is On: If you are unable to see the live stream from the Geeni app, check if the camera is on from the app. You just need to open the app and go to settings. From the settings, you can check which way ‘On/Off’ is the button turned. Click on it to turn on the camera or to turn it off.
In Conclusion
These are some troubleshooting methods you can try to fix any issues with your camera. We have also discussed the procedure to connect Geeni camera to WiFi. If there’s any issue you are facing while forming a connection, you can reset the camera. The reset will eliminate any glitches and bugs with the camera’s software
It will also restore the factory default settings of the camera. You will have to reconfigure the camera after the reset. Now, you can set up the camera again accurately. If there are any other issues you are facing with your camera, contact our team right now.
FAQs
Yes, you can absolutely use the Geeni app with any WiFi network. However, you will not be able to access some of its features. For a better user experience, connect your app to the WiFi to make the best of your camera.
When the Geeni app says the camera is offline, means it’s not connected to your WiFi. Without the WiFi, it won’t work at all. The device could be either out of the router’s range or the connection wasn’t successful. You will have to figure out the issue and troubleshoot it accordingly.
Yes, you can install the camera in a way to capture video above its location. Not limited to this, you can also rotate the camera, as it enables a 180-degree tilt along with a 360-degree tilt. From the app, you can rotate the camera anyway and look at the area you want.
When the camera blinks green light indicates that there is no internet connection available for the camera to form a connection with. You need to connect your device to a stable WiFi network.
A blue light on the camera indicates the connection between the camera and your WiFi didn’t form. Whereas, the blue light on the camera indicates the camera has reset. Now, you can set up the camera again.